The Lush Life: Gettin' Crafty
Hey everyone, AJ back again with the newest installment in The Lush Life Halloween special.
Now, you can’t have a big Halloween party without the decorations, so I figured I’d throw in a few ideas for décor and some do-it-yourself crafts. If your’e wondering what all the random bold initials are for, check out the first article in the series. In addition, if you need some costume ideas, check out part two of my series. Regardless, keep checking back for more ideas and more Halloween fun!
ATU:
A fun idea for decorating for an otherworldly theme is to find a constellation projector…you can usually get them at a thrift store or specialty science store for a decent price. Alternately, you can cheat and make your own.
DIY “Constellation Projector”
You will need:
- A working flashlight with batteries
- A box big enough to hold the flashlight with a little room to spare
- A large piece of aluminum foil
- Something to punch small holes (a pen can even do the trick)
Figure out which end of the box the light will be directed towards and mark it. This will be the side in which to punch your constellations when it’s time. Line your box with the aluminum foil and set it on a hard surface. Now, you can either plot out your constellations (they don’t even have to be real ones) or you can just poke holes. If you just poke holes on the top, it will only show on the ceiling, so consider your space when working on it. When it’s party time, place your box in a location where it’s not being obscured (a mantle or even in the center of your table works), turn on the flashlight, place it in the box and close the box.
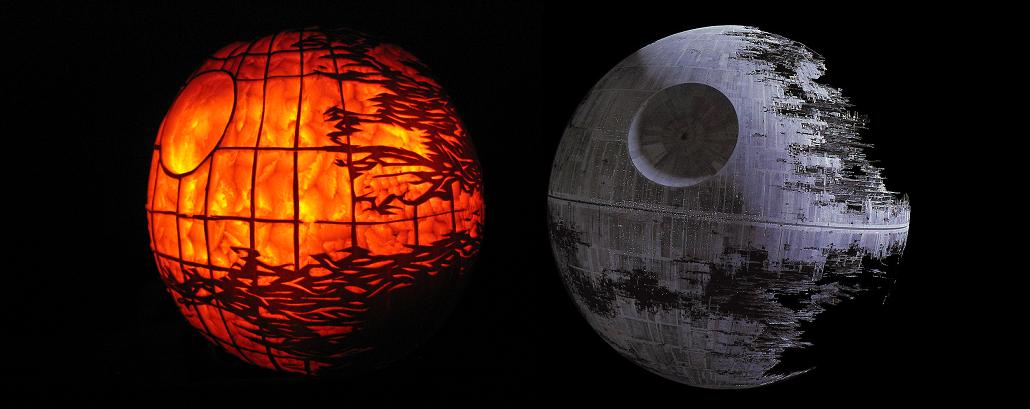
Alternately, if you’ve got a blacklight on hand, you can always buy or make your own glow in the dark galaxies. Most big box stores and craft stores carry packages of the little plastic glow-in-the-dark planets, but since those are just 2D you can always take it to the next level with a little creativity.
DIY Glow-in-the –Dark Planets
You will need:
- Styrofoam pieces, nerf balls, oranges…round things you won’t mind ruining of various sizes
- Glow in the dark paint (this can be found at most craft stores or big box stores)
- A paintbrush
- Nylon thread or string
Collect your round objects and set up a paint station (this can be as simple as sitting at your dining room table with a paper plate with all of your colors of paint). Go to town! You can paint all of the planets a single color or you can get creative and paint swirls, stripes, and “great spots.” For rings, you can use paper plates secured with toothpicks and tape. Let the paint dry and then hang the planets from various points using the nylon thread or a string (the heavier the planet, the stronger the string). After the party, these planets make excellent decorations for the space-inclined kid.
VGD:
Depending on your preference for video games, there’s all sorts of décor to be had for a VGD party. Halo and FPS fans might enjoy empty shells, burn spots, and overturned vehicles whereas RPG gamers will love broken weaponry and armor as well as scattered arrows.
Most everything you need you can find at thrift stores and garage sales. RC cars, old toy swords, even Nerf guns work wonderful. All you will need beyond those is a little black paint or “blood colored” paint (mix a little red with brown and a teensy bit of blue and you’ve usually got it). If you can find little video game action figures (or ones that can pass as such), those work too!
“Arrows”
You can always stick arrows around to simulate a battle…and they’re easy to make!
- You will need:
- Drinking Straws
- Brown or black Paint
- Scissors
- Wall putty or something similar
Squish one end of your drinking straws and cut in chevrons for “fletching.” Paint the whole thing and let it dry. To stick them around the house, put wall putty or something similar on one end. Cleanup is simple!
CB
Depending on the specifics, you can put logos around everywhere. One fun and simple idea is to convert my “constellation projector” into a box featuring different symbols from comic books…at very least you can do the Bat symbol!
HEW
Of course, it would be easy to just decorate with WoW memorabilia if you’re a total geek like me…but just going to shire is never a hard thing. Something easy is to pick your favorite inn and try to decorate according to that theme.
GHP
I can’t give much suggestion here except to say research your theme! Add cobwebs for extra effect and you can always try thrift stores to make sure to keep it extra cheap.
Other

As far as other geeky Halloween decorations, you can always go for potion bottles (mana and health!), mini Monster’s Manual monsters and more! Polymer clay and Crayola Model Magic are my best friends this time of year.

DIY Potion Bottles
You will need:
- Bottles of various sizes with stoppers
- Stick on labels/paper & some form of adhesive (rubber cement is great)
- Pens/writing utensils
- Optional: Tea
- Fillers
- A funnel
- Optional: Wax
To prepare the bottles, you need to first prepare the labels. You can use basic stick-on labels and marker or you can go all out and use paper which has been “aged” with tea and the contents written in careful calligraphy, it’s up to you. Either way, attach your label to a clean and dry bottle (you can use old bottles or purchase some at craft stores) and allow the adhesive to dry if you go the non-sticker route. Then you can fill the bottles and stop them with their appropriate stoppers. Alternately, you can drip wax to seal the bottles further…just be careful not to burn yourself! As far as fillers, there are all sorts of fun ideas you can run with. For health potions, you can use strawberry soda, or watered down strawberry syrup. For mana potions, you can use blue curacao, or blue Kool-aid. Use your imagination! A friend of mine used to always used stuffed lychees for “eyeballs” in a jar that she sealed up with red wax.
And now, since I know you all are waiting with bated breath…onward with the history!
Something interesting to consider is how they used to celebrate Halloween when it was the festival of Samhain. Whereas the forerunner of trick-or-treating became a tradition, it was primarily the traditions involving fire which ran the celebration. The Celts would build huge bonfires and spend the nights in revelry. The fire was seen as a purification, as well as a tribute to the deities. Oftentimes the bones of livestock would be thrown to the fire (a form of a sacrifice or offering of monetary vaule as the livestock were the most valuable thing in their culture). As night fell and the bonfires blazed, household fires would be extinguished and then relit from the flames of the one fire- a symbol of unity amongst the village or community.
Stay tuned for the biggest part of your party- the food and drinks!
The Schedule
October 17th: Party Ideas
October 19th: Costumes
October 21st: Decorations and Crafts
October 23rd: Recipes (Food and Drink- Alcoholic and Non)
October 25th: Jack-o’-Lanterns
October 27th: Last Minute Makeup Tips
October 29th: Halloween in Geek Culture
October 31st: An Extra-Special look at Halloweens of this Lush’s past…yeah, I’m going to bare my costumed soul for you all!